Well I've been very busy with courses as the semester is winding down. However, Im working on setting up a LAMP server (Linux, Apache, MySQL, PHP). LAMP is comprised of an Apache HTTP Server, MYSQL Database, and PHP. Also I got a 4-port router in the mail to connect a few prototype modules with the server, and to the internet. Programming work on the modules has slowed down a lot, but its still moving forward. The good news is that I found a blog where someone was able to setup a LAMP server to receive data from sensors through an Arduino, so thats where I'll start.
I've mostly devoted my free time in designing the IC boards for each module for mass production. Im also working on business models to see how successful I can be if I start selling my hardware as opposed to just sharing how the system is constructed. Basically, for those who are technologically saavy, they are welcome to reproduce the system using my posts, tutorials and code. For everybody else, they would probably want a ready to go system based on their needs: thats where I come in. I'll have to design and build the system so that its cheap, integrated, easy to use and simple for everyone, not just people who are technologically saavy.
Also by developing my own hardware, I dont have to worry about hardware attributing to anyone really, except those at Genesi-USA, for the server, DLink for the router, Arduino for the Uno and Wiznet for the ethernet adapter. The goal however for the IC boards is to remove the Arduino and Wiznet from the system, and integrate the Atmega32u4 and the w5100 chips to the board. This ought to reduce the bill of materials and the cost of assembly for mass produced boards.
Usually this step is taken after the system has been completely built and tested, but as that takes a considerable amount of time (which I dont have now), I'll work on what I can in the time I have.
For those who are interested, cheap (or somewhat cheap) PCB Fabrication can be done at Batch PCB (note:green boards are very cheap but contain lead) or at DorkBotpdx (note: purple boards are a little more expensive but are unleaded). PCB masks made from Mylar can be done at Pololu, made from Kapton at Ohararp and made from Steel at Rena Electronics. Solder paste can be bought at Sparkfun and stored in this Mini-Fridge. I recommend Antex Soldering Irons for manual soldering, and from what I've seen, an electric Hot Plate Reflow Skillet for SMD soldering. Id like to note, if you havent heard of Black Pad, read up more, it explains a phenomenon that occurs when the nickel plating of a pad corrodes, thus turning black.
Stay tuned for new updates.
Wednesday, April 27, 2011
Friday, April 22, 2011
Genesi Efika Cloud Computer
Great News! I got my Efika in the mail today, and I'm so excited. Now I can begin coding the database and all the visual interface GUI. Also I can start work on the module management system. Here are some pictures of the Efika as I opened up the box for the first time. This ought to give you a sense of just how small this computer is. Click on the images to zoom in.


Picture 1: Heres the outside of the box.

Picture 2: Heres the Genesi Logo.

Picture 3: Opened the box.

Picture 4: Pulled the Computer out of the box. You can really see how small it is.

Picture 5: Up close (you can see the power button on the top left of the unit)

Picture 6: Heres the front of the Efika computer. Theres a 12V power, an HDMI port, 10/100mbps ethernet, and audio/microphone plugs.

Picture 7: And heres the back; theres two USB 2.0 plugs and an SDHC card slot.

Heres the bottom of the unit with all the certification labels, website info and where its made. (Company is based out of San Antonio, TX, but the devices are assembled in China)

Picture 9: Finally we get to all the extras that come in the box: the power adapter, the power cable, and a serial adapter.

Heres another look at that serial adapter (didnt want to take it out of the protective bag just yet, because I dont know what Im going to use it for)
Well I guess that concludes 'show and tell'. I'll post updates when I start getting the software setup to get it to communicate with the Arduino.
Tuesday, April 19, 2011
Arduino Gas Sensor Module
Well I've begun work on the gas and smoke detection module for the Home Manegement system. This involves the use of the two sensors I briefly dicussed in my very first post. The first sensor is the MQ-7 which is a Carbon Monoxide gas sensor which detects CO as well as other combustible gasses, such as Hydrogen or Natural gas. While the second sensor, the MQ-6, which is a Liquified Petroleum Gas sensor, which detects combustible gasses such as LPG, isobutane, and propane in the air and ouputs its reading as an analog voltage. The MQ-7 sensor can measure concentrations of 10 to 10,000 ppm, while the MQ-6 sensor can measure concentrations of 300 to 10,000 ppm.
Basically the code will setup the sensors to measure data from both sensors every 1 second for 10 seconds, then average those values and transmit that average particulate count to the server for further calculations.
For the second phase of the project, I've begun planning for getting a Genesi cloud computer to serve as my Command & Control Server for the system. The Efika MX Smarttop has the following specifications:

This computer will host a web server, as well as a database for data logging, and the coding for a visual interface so that a user can easily access sensor zones in the system, and be able to configure various systems to their liking. I plan to use the included Ubuntu Maverick edition that comes with the Genesi computer to further allow the system to be open source and easily reproduceable.
In conclusion from the previous post, I've thrown out the idea of using the SD card for CSS and image hosting for the arduino, because I've decided there will be no web hosting/web server on the arduino other than to transmit/recieve data over the ethernet protocol. So there isnt a need to move forward with that line of thought. I'm trying to following the concept of KISS: Keep It Simple Stupid. I found that coding would not only be complicated to implement a webserver on each arduino sensor module, but it would increase the cost of each module in terms of setup and maintence. (I believe the web hosting was making the Ethernet module consume a lot of power, which in turn heated up the board; I'll test to see if this theory holds.)
The good news is that the Efika has a built in SDHC reader, so I can expand up to 32Gb solid state storage in the future if need be. So only 8Gb of SSD is not so bad; I'm really enjoying the fact that its an Arm-8 processor, this should be interesting.
Stay tuned for updates.
Basically the code will setup the sensors to measure data from both sensors every 1 second for 10 seconds, then average those values and transmit that average particulate count to the server for further calculations.
For the second phase of the project, I've begun planning for getting a Genesi cloud computer to serve as my Command & Control Server for the system. The Efika MX Smarttop has the following specifications:
- Freescale i.MX515 (ARM Cortex-A8 800MHz)
- 3D Graphics Processing Unit
- WXGA display support (HDMI)
- 10/100Mbit/s Ethernet
- 512MB RAM
- 8GB Internal SSD
- 802.11 b/g/n WiFi
- SDHC card reader
- 2x USB 2.0 ports
- Built-in speaker
- Audio jacks for headset
In conclusion from the previous post, I've thrown out the idea of using the SD card for CSS and image hosting for the arduino, because I've decided there will be no web hosting/web server on the arduino other than to transmit/recieve data over the ethernet protocol. So there isnt a need to move forward with that line of thought. I'm trying to following the concept of KISS: Keep It Simple Stupid. I found that coding would not only be complicated to implement a webserver on each arduino sensor module, but it would increase the cost of each module in terms of setup and maintence. (I believe the web hosting was making the Ethernet module consume a lot of power, which in turn heated up the board; I'll test to see if this theory holds.)
The good news is that the Efika has a built in SDHC reader, so I can expand up to 32Gb solid state storage in the future if need be. So only 8Gb of SSD is not so bad; I'm really enjoying the fact that its an Arm-8 processor, this should be interesting.
Stay tuned for updates.
Thursday, April 14, 2011
Arduino Home Management System Update 1
My gas sensors came in as have the Arduino, the Wiznet Ethernet adapter & shield. I've assembled all the kits, and begun programming and testing everything. I was worried because the Arduino wouldnt accept my sketch upload. But after sending some random characters through the serial monitor, the Arduino serial sync reset, thus was able to be programmed. As a result, my preliminary Web Server ran for the first time ever!
So the next major steps are advanced coding of the Web Server, then testing the Gas sensors and calibrating them. I strongly recommend starting out with this code which requires the Arduino Ethernet Library and the PROGMEM Library to work.
In the short term, Im going to try to install my SD card breakout board onto my Sparkfun ProtoScrewShield so that I can access my Web Server files from an SD card. That way the web interface can use some Cascading Style Sheets instead of being a boring white screen page.
Thursday, April 7, 2011
Arduino Home Management System
I'm planning to work on a new project in my free time using Arduino microcontrollers, some sensor packs, and Ethernet communications. Using MQ6 & MQ7 sensors and possible an IR sensor, I'll build an active fire alarm system that will communicate with a central management computer using Ethernet TCP/IP communication. Once I get all the components, I'll try to keep a weekly blog about coding tutorials, stuff I've learned or pictures of various assembly stuff to help others build various parts of this.
The point of this project is to be an active fire detection system. Current smoke alarms detect smoke long after a fire has been developed, which in a lot of cases only warns you to leave the building you're in until the fire department can show up to put out the fire. Fire alarms have little advantage over that, in that they are still passive, but just more sensitive, and more widespread. An active fire detection system would constantly monitor the air for various things that would indicate the beginnings of a fire. Once multiple sensors detect this raised level from some range that is assumed to be the threshold, a siren ought to go off to alert you. This is very critical because it wont just alert you that there's a possible fire igniting somewhere in your home, but it will also indicate where the fire is being detected, so that you can put out the fire immediately, long before fire department crews can come to your rescue.
Thus, this project intends not only to create an active fire alarm system, which would be open source for all others to give a shot at, but its also a "dry run" of a single module, of an intended much larger system for a Home Management network in my home. Simply, the management network is composed of multiple systems, all monitoring various sensor zones in my home. One example is this active fire detection system. Another can be AC\HVAC controls; another can be smart lighting in my home. Theres a whole ton of projects that could be done, and integrated together to create the smart-home energy efficiency system (SHEES, pronounced cheese ;) ).
So thats the gist of things for this project. Below are a parts list needed for the fire detection module, as well as some pictures of what some of the stuff looks like.
Components Required:
Arduino Uno
Proto-screw-Shield
Adafruit Ethernet (XPort/WIZnet) shield for Arduino kit (Installation Tutorial)
WIZnet WIZ811MJ Network Module with Mag Jack
CO (Carbon Monoxide) Gas Sensor MQ-7
LPG (Liquefied Petroleum) Gas Sensor - MQ-6
Gas Sensor Breakout Board
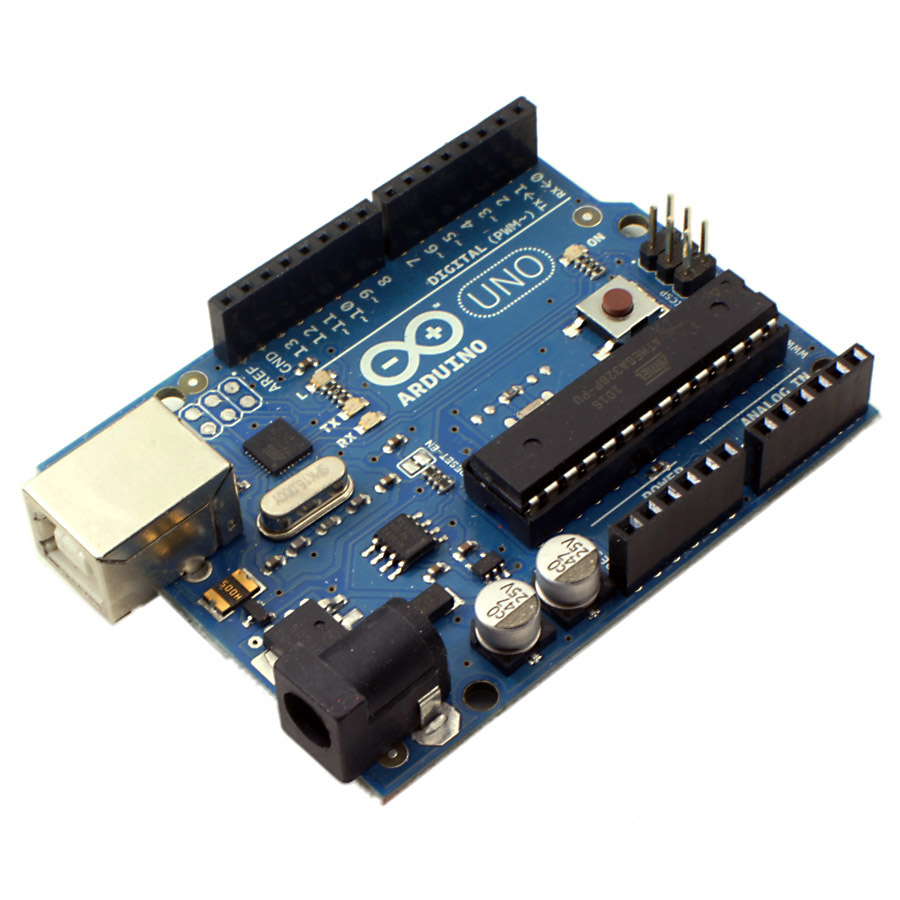
Heres what an Arduino looks like:


The point of this project is to be an active fire detection system. Current smoke alarms detect smoke long after a fire has been developed, which in a lot of cases only warns you to leave the building you're in until the fire department can show up to put out the fire. Fire alarms have little advantage over that, in that they are still passive, but just more sensitive, and more widespread. An active fire detection system would constantly monitor the air for various things that would indicate the beginnings of a fire. Once multiple sensors detect this raised level from some range that is assumed to be the threshold, a siren ought to go off to alert you. This is very critical because it wont just alert you that there's a possible fire igniting somewhere in your home, but it will also indicate where the fire is being detected, so that you can put out the fire immediately, long before fire department crews can come to your rescue.
Thus, this project intends not only to create an active fire alarm system, which would be open source for all others to give a shot at, but its also a "dry run" of a single module, of an intended much larger system for a Home Management network in my home. Simply, the management network is composed of multiple systems, all monitoring various sensor zones in my home. One example is this active fire detection system. Another can be AC\HVAC controls; another can be smart lighting in my home. Theres a whole ton of projects that could be done, and integrated together to create the smart-home energy efficiency system (SHEES, pronounced cheese ;) ).
So thats the gist of things for this project. Below are a parts list needed for the fire detection module, as well as some pictures of what some of the stuff looks like.
Components Required:
Arduino Uno
Proto-screw-Shield
Adafruit Ethernet (XPort/WIZnet) shield for Arduino kit (Installation Tutorial)
WIZnet WIZ811MJ Network Module with Mag Jack
CO (Carbon Monoxide) Gas Sensor MQ-7
LPG (Liquefied Petroleum) Gas Sensor - MQ-6
Gas Sensor Breakout Board
Heres what an Arduino looks like:
And here is what the Wiznet WS811MJ looks like:

Here is what the CO sensor looks like:

Finally, here is what the LPG gas sensor looks like:


Subscribe to:
Posts (Atom)